
How to check the metal detector got to you as not new any more. It’s simple, start with a coil.
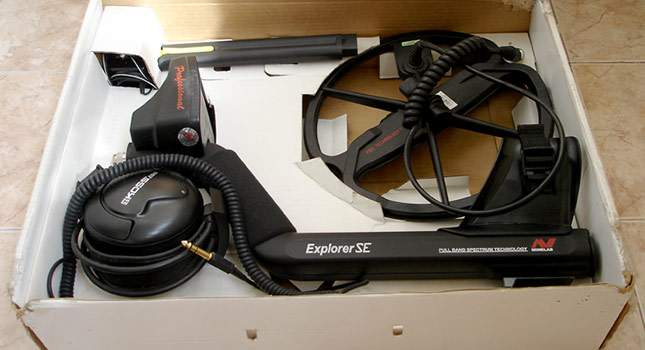
A metal detector can be conditionally divided into 3 components: shaft, electronics and search coil. You almost always see the total cost of the metal detector in assembly. But if you try to buy them separately, any of the components turns out to be rather expensive. For example, a coil may cost half of an inexpensive detector (and even more).
Search coil
Содержание статьи:

You should start to check a pre-owned metal detector with a search coil. Look at the work surface. Even if the metal detector has been used only once, there will be traces (scratches, scuff marks) left on the surface of the coil (or its cover). By these traces on the coil surface you can estimate the load level been provided while hunting. But the scratches themselves don’t affect anything, it’s ok. You will be adding them yourself with every going out.
It’s important that the coil have no chips (fractures). A rather deep fracture leads to coil depressurization. If moisture gets inside the coil, false signals appear.
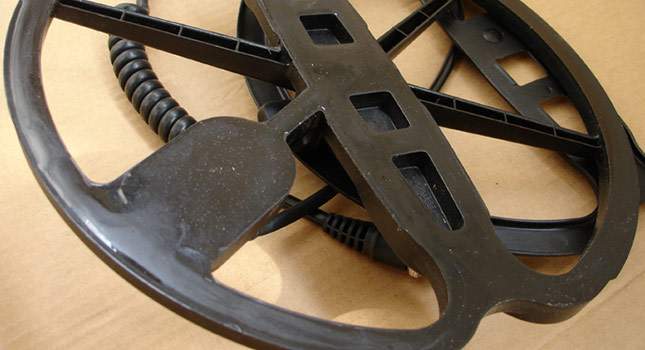
One more thing: if there is a fracture, then the coil has been bumped on the ground (rock, tree). The internal parts of the coil are well fixed and assume such a load, but well, there is a limit. If the bump is serious, operation of the coil can be disturbed. In this case any vibration (light knocking on the coil) will cause false responses.

Pay attention to the place of attaching the coil to the metal detector lower shaft. Broken ‘ears’ are almost always the purchase of a new coil. The repair of the ears is difficult and doesn’t go a long way. Most often, they either break because of a side impact or crack from the temperature fall. There are metal detector models with ears as a trouble spot, for example, the standard Minelab X-Terra coils.
Next, check the coil cable. Pay great attention to a cable strain relief, problems often start from this place. It must be intact and structurally sound. Any ingress of moisture causes false responses. Loose cable connection to the metal detector control box also causes false responses.
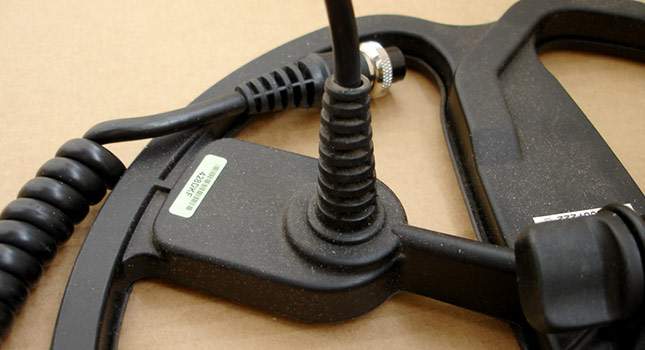
It’s desirable that the rubber washers remain at the place of the coil attachment. While searching the coil angle to the shaft is changing. At that, the coil must simultaneously make it possible to change this angle easily and not hang loosely. For this purpose the rubber washers are required. If they are absent, you start to tighten up a plastic bolt (the coil is attached with) and you will break it eventually.
Electronics check

Electronics is the most expensive component of the metal detector. And if the search coils are changed easily, as well as sold everywhere, it is difficult to find and buy electronics parts separately.
Most problems with the metal detector electronics arise from ingress of moisture inside the control box. Another common problem is a damaged screen.
The screen must be unhurt, without cracks and dimples. Tips for the beginners: screen damage very often happens during transportation of the metal detector.
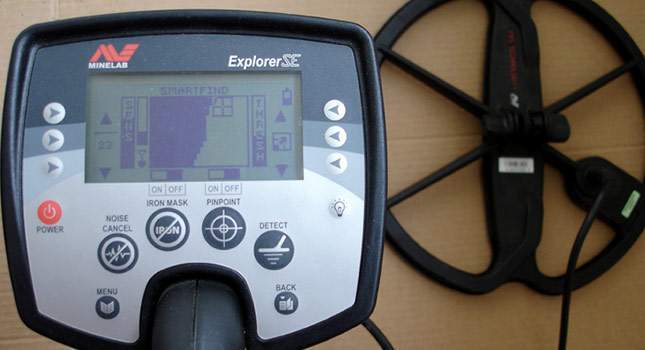
When you switch on the metal detector, the screen must be uniform and without artifacts. For example, ingress of moisture inside the control box leads to visible spots on the screen. Moisture inside the control box may cause incorrect (or partial) presentation of information on your metal detector display.
Check operation of buttons. Simply press one and all buttons, you must make sure the metal detector responds to pressing.
Discrimination. Important point: there are times when the metal detector looks quite operating, but having examined it carefully you find non-operating discrimination modes (mask search modes). It is easy to check, for this purpose you should have 2 or 3 objects made of different metals. The best thing is if these are iron, copper and silver (if you are a beginner, gold isn’t suitable; this metal is close to oxygenated iron).
First switch the metal detector to all-metal mode and bring your test targets by turn under the coil. All responses must be different and correspond to specification of the detector examined. For example, for the Garrett ACE 250 an iron object is the first (on the left) 1-2 graphical segments and a low-pitched tone. A copper object is the last (on the right) 1-3 graphical segments and a high-pitched tone of audio response.
Further you choose any mask search mode eliminating the response to the iron finds. Bring by turn your test targets. Iron must be silent.

While checking electronics don’t miss the battery compartment. It must be intact and without leaks.
Shaft
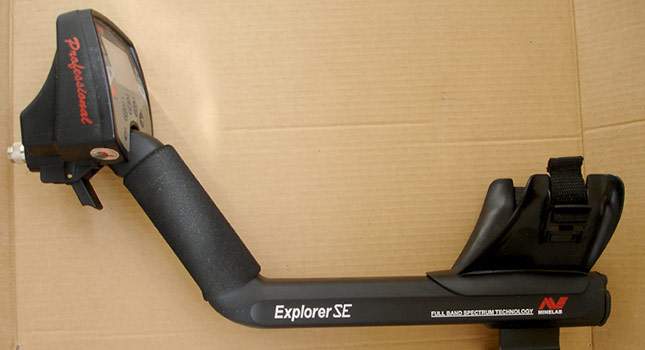
When checking a shaft you should start with an armrest, as it most commonly breaks down. If the armrest is broken or simply glued, at the first going out it will breaks again, but then it will be your problem.

If the metal detector is provided with the collet closing mechanisms (additional fixtures preventing connection between two parts of the shaft from coming loose), they must be intact.
It is desirable that a handgrip be with an intact non-slip patch piece. This detail is small, but its absence (or damage) reduces the overall level of comfortable search.
Tips. If you are a beginner buying a pre-owned metal detector and the seller is standing in front of you – ask him to show all these points himself, directly down this list.
Good luck to everybody in search!